What is GitLab and how do I use it on Contabo?
Table of Contents
- About GitLab
- System requirements
- How to install GitLab?
- I forgot my password to the application
- Resources
About GitLab
GitLab is a self-hosted DevOps platform that enables you to manage your code, CI/CD pipelines, and projects in one place. The Contabo 1-click GitLab app deploys the GitLab Community Edition (CE) as a Docker-based instance on a fresh Ubuntu server (VPS or Cloud instance).
Key features include:
- Ready-to-use GitLab CE instance running in Docker, including a pre-wired GitLab Runner container for CI/CD.
- Built-in NGINX and Let’s Encrypt for secure HTTPS access.
- Custom domain support: Use the default hostname or configure your own domain.
- Security by default: Public sign-ups and group creation are disabled out of the box.
- Easy management: All application files and configuration are organized under
/opt/gitlabon your server.
System requirements
These are the system requirements for the GitLab add-on:
- Operating System: Ubuntu 24.04 (fresh install on Contabo VPS or Cloud instance)
- Ports required:
- HTTP/HTTPS: 80/443 (host) → GitLab container
- SSH for Git over SSH: 2222 (host) → 22 (container)
- Disk space: Ensure sufficient space for repositories, Docker images, and backups (all data is stored under /opt/gitlab/data).
- DNS: For custom domains, you must create an A/AAAA record pointing to your server’s IP and open ports 80 and 443.
How to install GitLab?
1. Choose your desired VPS/VDS on the Contabo website.
2. Select the configuration options you want for your VPS/VDS.
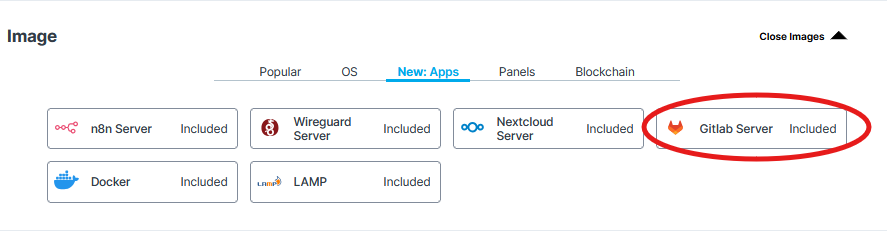
3. Scroll down to 'Image' and click on 'New: Apps', then choose GitLab Server.
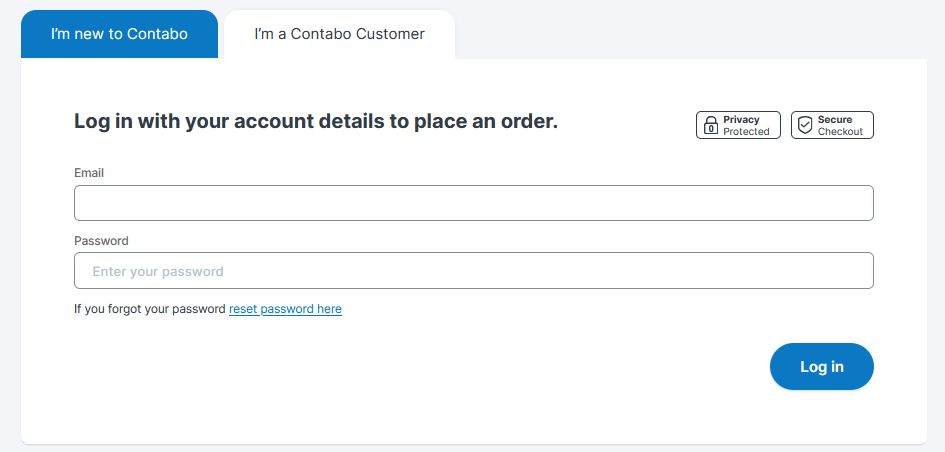
3. Proceed based on whether you’re a new Contabo customer, or you’re already a Contabo customer.
- If you're a new Contabo customer, fill out the Personal Data tab and choose your payment method
- If you're an existing Contabo customer, log in with your account details to place an order.
4. Continue to the Confirmation section. Click 'Order & Pay' to place your order. Important: It may take a few minutes for your order to be processed. Once done, you will receive an email with your login credentials.
5. Log in to the Customer Panel.
6. Click on ‘Servers & Hosting’ on the left side and select VPS/VDS from the drop-down menu.
7. Please note that it may take up to 30 minutes for your application to be installed and activated. Once it’s installed, you can access the application directly by clicking on its logo under the ‘Quick Action’ section on the right side.

If you are an existing customer and you want to run the application on an existing instance:
1. In the VPS/VDS section, choose the instance you want your application to be installed on
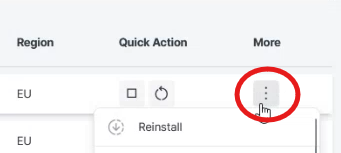
2. Click on the three vertical dots under ‘More’, then click ‘Reinstall’
3. Select the preferred installation type (Standard Installation/Application Installation/Advanced/Custom Image Installation)
4. Proceed based on the installation type you chose;
If you chose Standard Installation/Application Installation:
- Choose the relevant application from the ‘Application’ drop-down list and set your password
If you chose Advanced/Custom Image Installation:
- You can install the image by using an SSH-key
- If you choose the application from the Cloud-Init drop-down list, you will need to enter the password to continue the installation.
5. Click ‘Install’
6. The application button will appear under ‘Quick Action’. You can access the application directly by clicking on the button. Please note that it may take up to 30 minutes for your application to install.
(Optional) Set up a custom domain
It is possible to set up a custom domain. The setup process uses the host name by default.
- Create an A/AAAA record for your domain (e.g., gitlab.example.com) pointing to your server’s IP address
- If you’re using external DNS servers, propagation may take up to 48 hours.
- To verify that your domain is resolvable, you can ping the domain - if it responds correctly, it is ready for use.
- Once the domain resolves, set it in /opt/gitlab/.env as DOMAIN=gitlab.example.com
- Start the stack with docker compose up -d from /opt/gitlab
- Let's Encrypt will automatically issue certificates once DNS is set up.
First Login
- Access your GitLab instance at https://<DOMAIN> (or the default hostname).
- Log in as root using the password from /opt/gitlab/.env.
- ⚠️Important: Change the root password immediately after logging in.
Managing Gitlab
- Start/stop services:
- docker compose up -d (start)
- docker compose down (stop)
- Check status: docker compose ps
- Logs:
- Container logs: docker logs -f gitlab
- Service logs: /opt/gitlab/logs/
Registering the Gitlab Runner
- Get a registration token from the GitLab UI (Admin area or project settings).
- Register the bundled runner using the provided command in the documentation.
Email setup
- The default setup uses a basic Postfix relay for outbound notifications.
- For reliable email delivery (e.g., password resets), configure your domain’s SPF/DKIM/DMARC and/or switch to a reputable SMTP provider in docker-compose.yml.
I forgot my password to the application
Contabo does not manage or store customer passwords.
When setting up your server, you choose a password that is used both for accessing your VPS/VDS and for the application itself. This applies to both new orders and reinstallations.
If you have changed the initial password, Contabo does not have access to or visibility of it.
- If you have linked your email to the application, you can use the “I forgot my password” option on the login page to reset it.
- If you have not linked your email, the only way to regain access is to reinstall or perform a new installation of the application. ⚠️ Important: Please note that this will result in data loss.
Resources
Please note that after the installation, you are responsible for maintaining, updating, and troubleshooting the application.
In case you need assistance, please refer to the official resources:
Was this article helpful?
That’s Great!
Thank you for your feedback
Sorry! We couldn't be helpful
Thank you for your feedback
Feedback sent
We appreciate your effort and will try to fix the article
